
VoiceMeeting User Manual
NOTE: this HTML version of the User Manual only aims at giving a general idea of the Manual .
The user will then decide if he really wishes downloading the Manual in WORD format (approximately 9 Mbytes, due to the high number of images).
Download Manual in WORD format
In case of problems, please do not hesitate asking a copy
printed on paper to: voice@jrc.it or fbl@lomellina.it


SUBTITLING SYSTEM
1 – SOME HISTORY
A few years ago we decided to create a school lessons subtitling system for deaf students. The European Commission showed the same interest and now we are collaborating with the Ispra based Joint Research Center to the Voice project.
Well even school and hearing impaired students problems still rank first in our priorities, VoiceMeeting has shown non- completely unveiled application potentials. It was used in the creation of an automated information desk for disabled people, mostly deaf and elderly people; it was proposed as a tool to teach foreign languages and as a classroom digest for technical training courses given by foreign teachers.
In the classroom, generally, the teacher speaks into a microphone and looks at the students. A video camera takes the teacher's, blackboard's and the surrounding environment's images. Both the microphone and the video camera are connected to a personal computer, which, by means of VoiceMeeting, projects both on the computer screen and on a video projector's screen the images (the video camera images) subtitled by the words spoken by the teacher.
Both the deaf students and the entire class, focus their attention on the images created by the personal computer.
In this way the same information is transferred to all students in the same class with the same words at the same time.
On the basis of the same principle a personal computer, installed at the information desk, enables the dialogue between the speaker and the user of this service.
The speaker speaks in front of a video camera, which takes the images, and into a microphone which recognizes the speech. A screen in front of the user displays the speaker's image together with the written subtitling lines containing the exact words of the speaker.
There are several functions available to allow a more effective speaker – user dialogue:
The Images Collections allow to store fixed images or video clips and to display them on the screen by means of a voice or of a key command. The image can be a document to fill in, the video clip can be a demo of how to sign a document.
The highlighting tools behave either as a marker, by drawing circles or traces, or as a highlighter, by highlighting in yellow, on a sheet of paper, an interesting subject. The image on the screen corresponds to the sheet, the marker and the highlighter are replaced by two mouse functions. By means of the keyboard notes can be "stuck" within the circle or trace or on the yellow line.
Printout of the image displayed on the screen: the image selected out of the Images Collection, with the necessary highlights, if any, can be printed and handed over to the user (as a reminder).
Text function: the sentences said by the speaker and displayed on the screen at the bottom of the images, are stored in a file. At the end of the speech, the speaker can easily review the text, print it and hand it over to the user.
Users have a number of options available, which allows them to easily customize their workstation according to their needs:
2 – PRODUCT DEVELOPMENT AND ALIGNMENT WITH THE CURRENT TECHNOLOGY.
The new strongly enhanced performances personal computers available on the market, the availability of new graphic cards and the release of the new versions of the Dragon Systems Inc. (Newton MA USA) products pushed us to look for a new application, which could make the most of all the new available resources.
Thanks to the availability of new tools for the software development we have been able to design an application on the basis of completely new assumptions, thus achieving a higher stability level:
Use of any graphic cards endowed with a VfW (Video for Windows) driver;
Possibility of directly following the evolution of the speech recognition engine without having to re-write the entire application or even a significant part of it acknowledged by Dragon Systems;
Use of all the audio cards accepted by Dragon Systems Inc. (Newton MA USA);
Possibility of using the application also with laptop computers.
The suggested hardware configuration is the following:
The personal computer must also be integrated with the following equipment:
The application's graphic interface is highly user-friendly and its options and commands are all grouped in a single toolbar:
3 - VOICEMEETING SUPPORT
For further technical and commercial information, contact:
FBL S.r.l.
Contrada della Torre 16
27036 Mortara (PV)
tel. 0384 91399
fax 0384 91362
Thank you!
TABLE OF CONTENTS
1. Toolbar pag. 1
1.1 Microphone pag. 2
1.2 Language pag. 2
1.3 User pag. 3
1.4 Minimize and Close buttons pag. 3
2. Options pag. 4
2.1 CPS pag. 5
2.2 Images Collection pag. 5
2.3 Graphic Card Options pag. 6
2.4 Text Options pag. 7
2.5 Speakers Profiles pag. 9
2.6 Drawing Options pag. 10
2.7 Subtitles Height pag. 11
3. Images Collections pag. 12
3.1 Creating a new Images Collection pag. 13
3.2 Managing the Images Collection pag. 14
3.3 Using the Images pag. 15
4. Function Keys pag. 17
5. Text pag. 19
 1. TOOLBAR
The toolbar is displayed whenever you start VoiceMeeting.
The commands are (from left to right):
Microphone (1.1) It can be switched ON and OFF. When on, it recognizes the sounds and displays a yellow/green/red bar, which indicates the sound level low/medium/high.
Options (2) It allows to select customization options.
Text (5) It stores the entire text captured, word by word, as it is displayed on the screen.
Language (1.2) VoiceMeeting can be used in different languages. Generally, Voice Meeting is delivered in Italian. Versions in English, French, German and Spanish are also available.
User (1.3) It allows a quick selection of the speaker profile among those available within the application. The New button allows to create a new user.
Minimize button (1.4) It minimizes the application to an icon.
Close button (1.4) It closes the application.
The toolbar disappears by moving the mouse up or down.
The toolbar will appear again by repositioning the mouse.
1.1 Microphone
It has two positions: ON/OFF.
When on, it recognizes the sounds and displays a yellow/green/red bar, which indicates the sound level low/medium/high.
![]()
![]() Microphone
off microphone on
Microphone
off microphone on
To pause the microphone say "Go to Sleep", to return to the recognition mode say "Wake up".
If you click any other button (Options, Text, …..) the microphone turns automatically off.
![]()
1.2 Language
The drop-down list box shows all of the languages available within the system. Generally, VoiceMeeting is delivered only in Italian. Versions in English, French, German and Spanish are also available. Their use requires the speech recognition engines for the selected languages and the training of the new Speakers Profiles.
1.3 User
![]()
Within the selected language, you can also select a user profile for the application.
Select New to create a new profile; this will start the Training process (see also Chapter Options/ Speakers Profiles for Microphone set-up, Training and Document analysis).


VoiceMeeting uses the Dragon Systems inc. Newton (MA) USA, speech recognition product Dragon Naturally Speaking ™. The original Dragon product is supplied together with VoiceMeeting and can be used separately.
The Create new user, Set-up microphone, Training and Document analysis functions reflect the Dragon application functions.
For further details about their use, refer to the Dragon application manual.
![]() 1.4 Minimize
and Close buttons
1.4 Minimize
and Close buttons
They act according to the Microsoft standards and minimize to icon or close the application.
2. OPTIONS
![]()

Click the Options button to display a window containing the following features:
Graphic Card Options (2.3) It allows to select the Video Source and the Graphic Card set-up options.
Text Options (2.4) It allows to select the background and text colors and the subtitle font.
Speakers profiles (2.5) It allows to define the parameters to improve the voice recognition spectrum.
CPS (2.1) It allows to define the subtitles minimum permanence period on the screen
Drawing Options (2.6 ) It allows to define the Highlighting Color, the Page and the Annotation Options.
Subtitles Height (2.7) It allows to define the height of the window band used to display the subtitles.
Images Collection (2.2) It allows to select the collection to be used during the lesson or presentation.
2.1 CPS (Characters Per Second)
![]()
Users can define the subtitles minimum permanence period on the screen. An algorithm counts the number of characters in the sentence and divides it by the number of Characters Per Second (CPS) defined by the user, thus defining the minimum permanence period of the sentence on the screen. If the speaker's pace is too fast, the system automatically defers the displaying of the sentences on the basis of the stated time, thus ensuring the user-defined subtitle minimum permanence period.

2.2 Images Collection

The Images collection to be used during the lesson or presentation can be selected in the relevant drop-dowm list box.
Click OK to confirm the options selected in the Options window.
2.3 Graphic Card Options


Each has a different control panel to select the relevant configuration options.
The example in the picture above shows the ATI graphic card control panel. The control panel options are basically the same regardless of the installed graphic card.
Confirm the selected options by clicking OK.
The graphic card driver can sometimes include in a single control panel both the Video Source and the Video Properties. In this case the second button (Properties) will not be active (as in the ATI graphic card example).

For any information, always refer to the graphic card manufacturer user's guide. Click OK to confirm the selected options.
(The window displayed in the example refers is the ATI graphic card's)
2.4 Text Options

![]()
![]() They
allow users to customize the subtitle.
They
allow users to customize the subtitle.
![]()

Select the Background and Text color you want and then click OK to confirm your selection.
Check the Preview in the Options window and then confirm or cancel your selection.
![]()
![]()
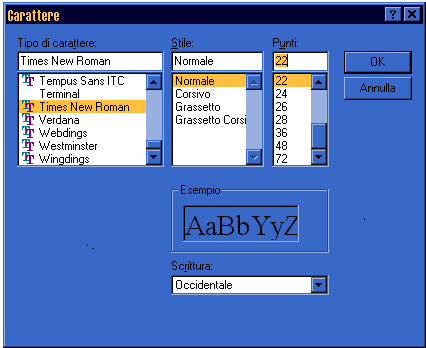
Choose a Font, its Style and its Size (points), then click OK.
Check the Preview in the Options window and then confirm or cancel your selection.
In the Options window you can also select the "All Caps" check box to format your text as capital letters.
 2.5 Speakers
Profiles
![]()
The window shows the names of the users whose speaker profiles are stored in the application.
Select a user and click Cancel to remove it from the list. The active user cannot be cancelled.
When you highlight and select a user profile name by means of the toolbar, it becomes the active user.
The available options for the active user profile are:
 2.6
Drawing Options
These options allow users to configure and use the screen as a blackboard to make annotations and highlight contents.
The available options are:
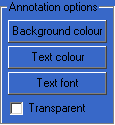 Annotation Options
You can customize the annotation background and text colors by means of the Colors dialog box and the annotation font by means of the Fonts dialog box - see Text Options (2.4)
The Transparent check box allows to write annotations, leaving the blackboard or the screen image as the background.
Page Options
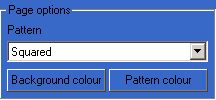

You can select the blackboard pattern, among those listed in the drop-dowm list box, and the background and pattern colors by means of the Colors dialog box - see Text Options (2.4)
Highlighting Color.
You can select the Highlighting Color by means of the Colors dialog box - see Text Options (2.4 ).
The above-mentioned options are available in the Drawing Options window and must be confirmed by clicking the OK button. The Cancel button retains the current options.
2.7 Subtitles Height
You can select the height of the VoiceMeeting window band used to display the subtitles. The accepted values range from 50 to 400.
 The suggested value is approximately
130, as in the example in the following picture.
![]()
3. IMAGES COLLECTIONS
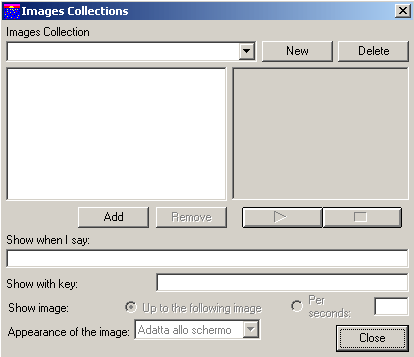
Images Collections give you the possibility to create and manage folders containing photos, video and audio files. They can be recalled by means of a keyword or of a command key and replace the television images on the screen. You can also play audio files by means of a keyword or of a command key.
In the drop-down list box, select the Images Collection you want to use and click OK.
3.1 Creating a new Images Collection
The first step in creating a new Images Collection is to assign a name to it.
Click NEW and enter the name of the new Collection.
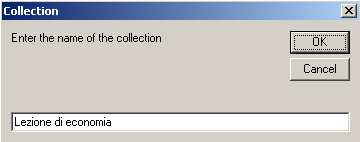
If the collection's name already exists, a warning will appear on the screen.

If you want to delete an Images Collection, select it in the drop-down list box and click the DELETE button.
3.2 Managing the Images Collections
Select the collection you want to use from the drop-dowm list box.

![]()
If you want to add an image, video or audio file to the collection, click "Add" and define, in the displayed window, the correct path for the file you want to add.
Click "Open" to add the image/file to the collection.
You cannot add the same file to the same collection (image, video or sound) twice.
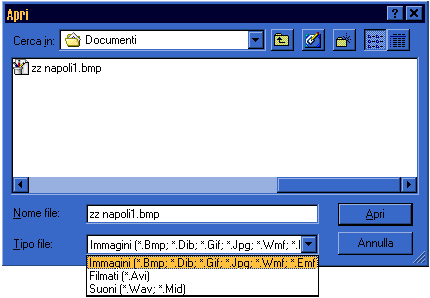
Such an attempt generates a warning as the following:

3.3 Using the Images
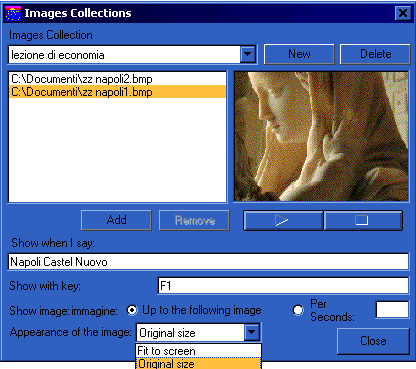
When you select an image you see its preview, which can be displayed either in its original size or in full screen size. Select the display mode in the dorp down list box. The display mode selected in the preview will be the same when the image is displayed on the screen.
When using VoiceMeeting you can display the image on the screen in two ways:
- By means of a voice command, by saying the sentence stated in the "Display when I say" box (In the example: "Napoli Castel Nuovo")
- By pressing the assigned key (in the example press [F1] and not [F]+[1]).
Warning!
Some keys cannot be used since they are already used for other functions: see Chapter "Function Keys"
The selected image will be displayed on the screen:
Until the next image
Seconds: indicate the required number of seconds, max 60 seconds (values >60 are automatically restored to 60)
You can remove the selected image from the collection by clicking "DELETE".
 If you select a video or an audio
file, click "PLAY" to see the preview and "STOP" to stop
it.
Audio files warning:
You can play Midi and Wave audio files.
No particular audio card requirements are necessary to play Midi files.
A Full-Duplex audio card is necessary to play Wave files during the speech recognition phase.
You can play any Wave file formats. In some cases, according to the installed audio card, you may need to use a playing format, which is the same as the recording format: in this case the Wave file must have the following format requirements: 11,025 Hz, 16 bit, mono.
4. FUNCTION KEYS
With the video-camera on the following keys are available:
[Del] To clear the image on the screen
[Ins] To clear and restore the video image on the screen
[Pause/break] To print the screen image
When the screen displays an image coming from an Images collection, you can print it by pressing the [Pause/break] key. The printout will show the entire screen content: image + text lines.
The image displayed on the screen can be edited before you print it, by means of two functions available by means of the mouse right and left buttons.
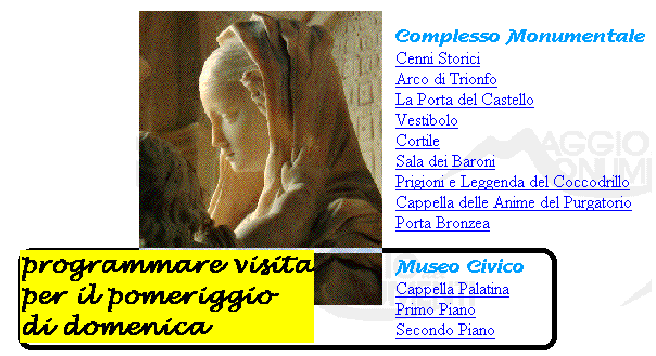
[Mouse left button] - "Marker" Function
It allows you to highlight a portion of the image by means of a drawing trace similar to the one left by a marker on a sheet of paper. Keep the mouse left button depressed until you have drawn your marker's trace. Click any point on the screen to delete the marker's trace on the image.
You can write notes within the marker's trace, by means of the keyboard; press [Pause/break] if you want to print the image (Warning! When printing, all of the other processes, voice recognition, etc. will be slower).
[Mouse right button] - "Highlighter" function
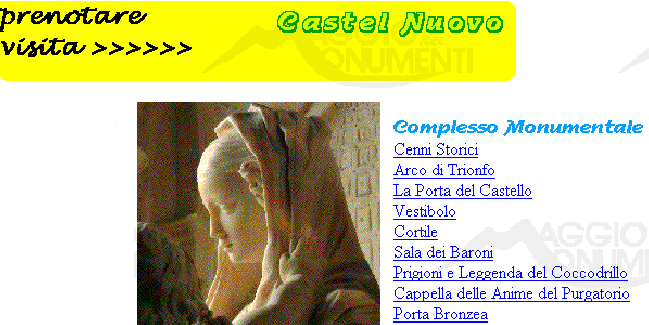
You can highlight in yellow any area on the screen and "stick" a note to it by means of the keyboard.
Place the mouse in the area you want to highlight, keep the mouse right button depressed and drag the mouse so as to draw a yellow area of the required size.
By means of the keyboard you can write also a note. Click any point on the screen to delete the highlighted area and the related note. Press [Pause/break] to print.
5. TEXT
![]()
The text captured by the application and highlighted in the subtitle is stored, sentence by sentence, in a window, which can be displayed by clicking the TEXT button.
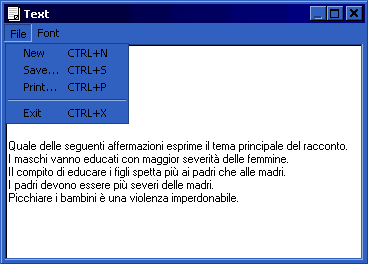
Text revisions (corrections, integration, deletion, font change…), save and print actions are available, by means of the traditional Word Processor functions.